Incoming Goods Mobile App
Introduction
Basic Concepts
User Interface
Step-by-Step Guide to the App
Login
Manually entering your login credentials
Scanning Your Personal QR Code
Home Screen
Instructions:
Receive Delivery With ASN
"Shipment" field
"Item" Field
"Serial Number" Field
"Locks" Field
"Tenant" Field
"Handling unit" Field
"Load support" Field
"Book" button
Additional Menu
Instructions for Receive Delivery With ASN
Receive Delivery With ASN NVE
Home
"Shipment" field
"Receive Delivery" Field
"Handling Unit" field
"Item" field
"Serial Number" Field
"Locks" Field
"Tenant" Field
"Load support" Field
"Book" Button
Processing an ASN-NVE with Multiple Line Items
Additional Menu
Instructions for Receive Delivery With ASN NVE
Receive Delivery Without ASN
"Receive Delivery" Field
"Item" field
"Serial Number" Field
"Locks" Field
"Tenant" Field
"Handling unit" Field
"Load support" Field
"Book" button
Additional Menu
Instructions for Receive Delivery without a Delivery Notice
Sidebar Menu
Settings
Additional Resources
Getting Started Tutorial
Documentation: Incoming Goods WebApp
Table of Contents: Incoming Goods Mobile App
Introduction
The Incoming Goods Mobile App is designed for warehouse staff on the shop floor in the incoming goods area. It provides all the essential functions for receiving shipments, recording them in the system, and preparing the goods for storage in the warehouse.
All shipments that have been approved in the Incoming Goods Web App are available in the Incoming Goods Mobile App for further processing. In addition to these approved shipments, the Incoming Goods Mobile App can also be used to create and process a previously unannounced goods receipt for delivered goods. These steps can also be carried out in the Incoming Goods Web App, but the mobile app simplifies and speeds up processing by using a mobile device with a barcode scanner or camera and an intuitive user interface.
Basic Concepts
The first step in the process of recording shipments is to select the Receiving goods location to which the delivered goods are to be booked.
In the second step, you must select the type of delivery to be recorded:
- Receive Delivery With ASN: For shipments for which new stock unit numbers are generated.
- Receive Delivery With ASN-NVE: For notified shipments that already have a shipping unit number (NVE / SSCC), which is transferred.
- Receive Delivery Without ASN: For shipments that are entered manually and are not announced by an ASN, or to add items to an existing goods receipt.
In the third step, the individual items and their quantities that make up the delivery are booked. In this step, additional details can also be entered and configured, such as blocks, best-before dates, tenant, batches, comments, alternative IDs, images, serial numbers, and more.
Once the goods have been received, the loaded handling units are available for subsequent processes, and confirming the goods receipts for the shipments or purchase orders enables invoice approval in the ERP system.
User Interface
The Incoming Goods Mobile App features the standard mobile app user interface of Bitergo WMS. For details, see the chapter on User Interface and User Experience.
Step-by-Step Guide to the App
Login
You can log in to the app in two ways:
- by entering your user credentials manually
- by scanning your personal QR code in the Bitergo WMS user portal
Manually entering your login credentials
In the "Username" field, enter the email address you used to register with Bitergo WMS, and in the "Password" field, enter your password. Click the "Log In" button to log in to the system. You will be logged in and redirected to the app's home screen. If necessary, you can use the "Change Server" button to enter or change the server address of your Bitergo WMS manually.
Scanning Your Personal QR Code
Click the QR code icon to open the camera. Log in to the user portal via a browser on another device and use the camera to scan your personal QR code. It contains your user information, password, and the server address. As soon as the QR code is scanned, you will be logged in and taken to the app's home screen.
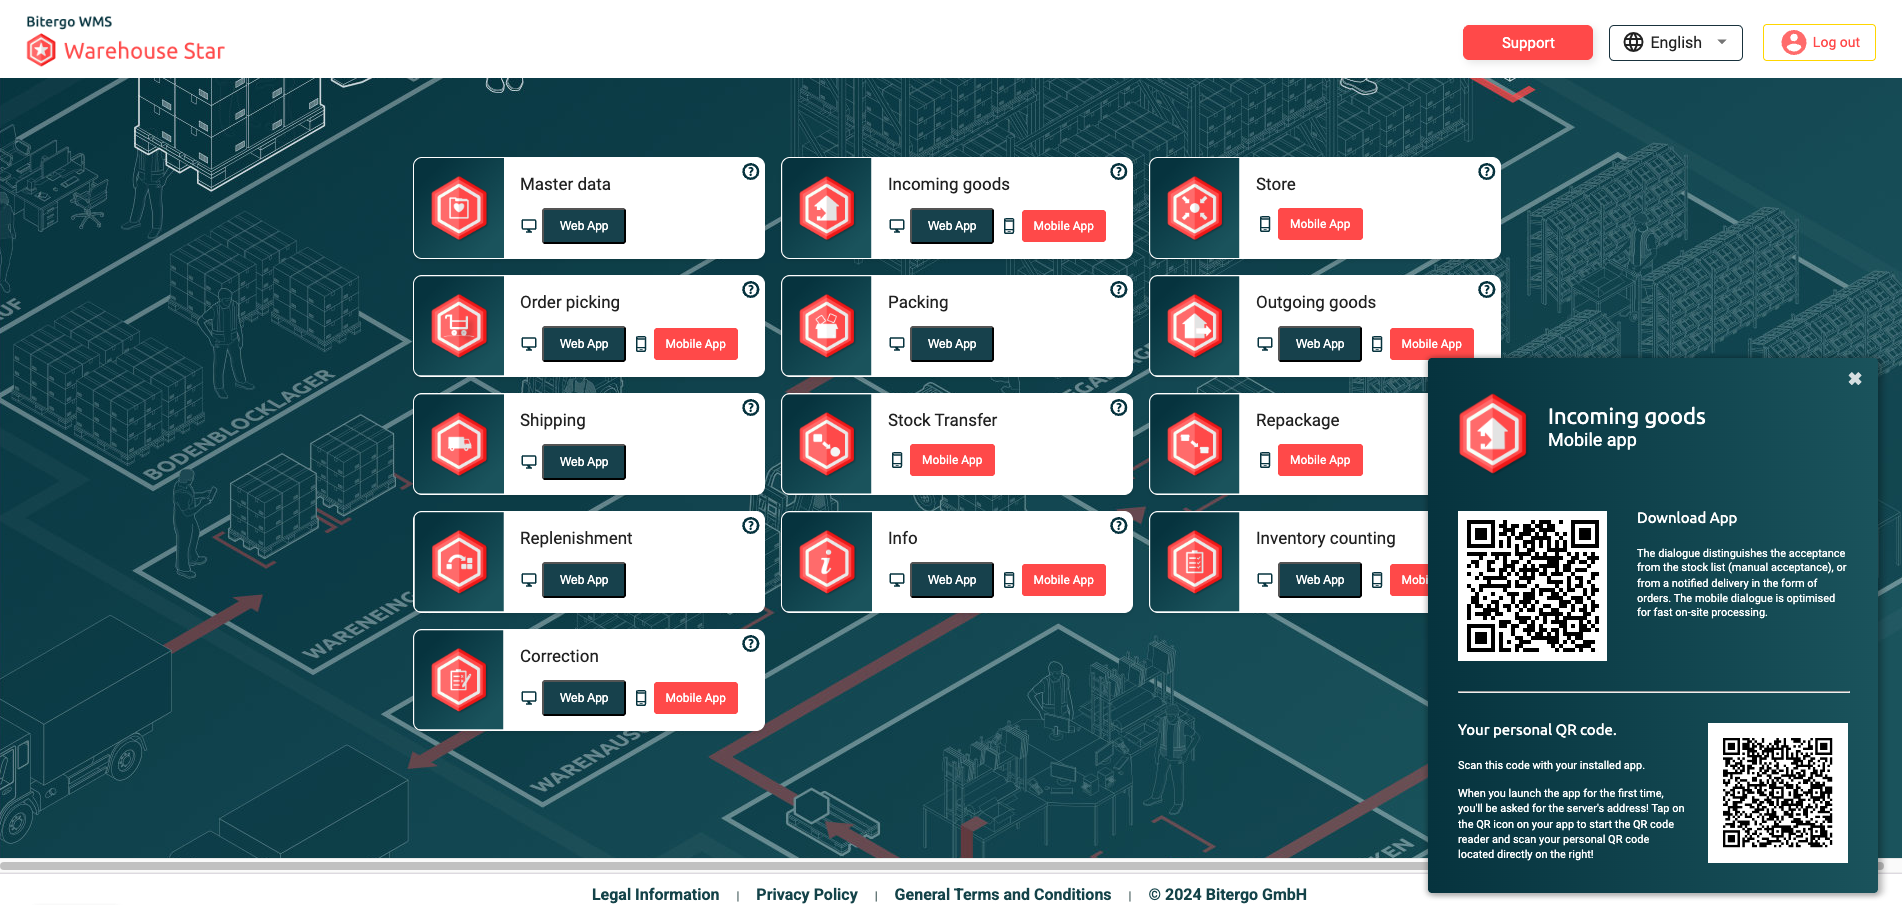

Home Screen
From the home screen of the Incoming Goods Mobile App, you can open the sidebar menu by tapping the menu icon in the upper-left corner of the header. Using the sidebar menu, you can log out, view the legal notice, or adjust settings; for more information, see the "Sidebar Menu" section.
In the center of the home screen, you'll find the "RD Location" field, which stands for "Receive Delivery". Scan the code for the Receiving goods location where the delivered goods you want to book are located, or enter the name of the Receive Delivery location manually using the keyboard to activate the buttons below it.
At the bottom of the home screen, you'll find the following buttons:
- Receive Delivery With ASN
- Receive Delivery With ASN-NVE
- Receive Delivery without ASN
These buttons are only activated after you have selected a Receiving goods location.
Instructions:
- Scan the code for the Receiving goods location using the device, or enter the name (or number) of the Receiving goods location via the keyboard into the "RD Location" field and press "Enter."
- The name of the selected receiving location appears in the "Receive Delivery Location" field, and a green checkmark on the right side of the field confirms that the Bin Location is selected in the app. The buttons for selecting the type of goods receipt to be booked are now enabled.
- Select the type of goods receipt you wish to book:
- Receive Delivery With ASN: For notified shipments for which new handling unit numbers are generated. Continue reading in the chapter "Receive Delivery With ASN."
- Receive Delivery With ASN NVE: For notified shipments that already have an NVE / SSCC (shipping unit number), which is carried over. Continue reading in the chapter "Receive Delivery With ASN-NVE."
- Receive Delivery Without ASN: For shipments that are entered manually and are not announced by an ASN, or to add items to an existing goods receipt. Continue reading in the chapter "Receive Delivery Without ASN."
Receive Delivery With ASN


After you have selected the Receiving goods location and clicked the "Receive Delivery With ASN" button, the "IG-01 ASN" page opens.
In the header, you will find:
- the "Back" icon (left arrow) on the left side: cancels the process and returns you to the home page. All entries in the fields of the main work area will be lost.
- the page name: It consists of the selected Receiving goods location followed by "ASN" (in our case the location is called "IG-01" for "Incomig Goods 01").
- the additional menu icon (three dots stacked vertically) on the far right.
In the main work area, you will find the following fields:
- Shipment
- Receive Delivery
- Item
- Quantity
- Unit
- Unpacked
- Unit
- Serial number (optional via sidebar menu / Settings)
- Locks
- Tenant (optional via sidebar menu / Settings)
- Handling unit
- Load support
- Height
- Unit
"Shipment" field
Use the magnifying glass icon in the "Shipment" field to select one of the approved, notified shipments to edit it. After you click the field, the "Receive Delivery" page opens. Here you'll see a list of all shipments approved for goods receipt.
"Item" Field
After selecting a shipment via the "Shipment" field, you must now book all the items that make up the shipment individually. To do this, first select the item for a specific line item. Click the "Item" field to open the "Receive Delivery" page, which now displays only the line items from the selected shipment.
"Serial Number" Field
The "Serial Number" field can be optionally displayed via the settings in the sidebar menu. For more information, see the "Sidebar Menu" section. Here you can enter the item's serial number.
"Locks" Field
After selecting the item and quantity, you can add locks via the "Locks" field if desired. A lock means that the item is blocked for certain processes, for example, due to quality inspection, damage, a recall, or the need for clarification. To select a lock, click the "+" icon on the right side of the "Locks" field.
"Tenant" Field
The "Tenant" field can be optionally displayed via the settings in the sidebar menu. For more information, see the "Sidebar Menu" section. Here, you can assign a tenant---already created in the master data---to the shipment.
"Handling unit" Field
In the "Handling unit" field, you can enter your own handling unit number. If you leave the field blank, Bitergo WMS automatically creates a new handling unit number. You can control this behavior via the settings in the app; see the "Sidebar Menu" chapter for details.
"Load support" Field
In the "Load support" field, you can select the appropriate Load support from the dropdown list of predefined Load supports. The list of Load supports is defined in the Master Data app. In the settings, you can select a default Load support, which will then appear as the default in the field. Additionally, in the settings, you can specify whether selecting a Load support is mandatory or not.
"Book" button
Once you have entered all the necessary information for the item, click the "Book" button at the bottom of the page to book this item to a new handling unit at the selected Receiving goods location .
The message "Receive Delivery has been booked!!" appears at the bottom of the page.
The currently selected shipment remains selected, and the "Item" field is highlighted so you can continue the process with the next line item. If needed, you can use the settings in the sidebar menu to configure the system so that the "Shipment" field is cleared after each booking. Bitergo WMS is set by default so that the selected shipment continues to be displayed in the "Shipment" field after a line item has been booked, allowing the user to quickly move on to the next line item.
After you have booked all items for a shipment, you can, if necessary, click the "Shipment" or "Item" field to review the list of items for that Shipment. If all items or the Shipment itself have a green status, this means that the goods receipt booking has been successfully completed.
Additional Menu
Using the Additional Menu in the upper-right corner of the header, you can perform the following functions:
- Change Bin Location: Using the "Change Bin Location" dialog, you can change the bin location to which you are booking the selected Shipment.
- Add a note to receive delivery: Add a note to the entire goods receipt or to the line items.
- Add Alternative IDs
- Information:
- Container No.
- Seal No.
- Truck arrival
- Start of unloading
- End of unloading
- Truck Departure
- Add image to receive delivery...: Add an image to the goods receipt by, for example, taking a photo with the camera or selecting one or more existing images from the gallery.
- Scan ASN Position...: Scan the item from the ASN
- Scan serial number...: Scan the item's serial number.
Instructions for Receive Delivery With ASN
- Select the Receiving goods location to which you want to book the shipment by manually entering it in the "RD Location" field or by scanning. Click the "Receive Delivery With ASN" button.
- Click the „Shipment" Field and, on the next page, select the Shipment you want to book to the goods receipt from the list.
- Click the "Item" field and, on the next page, select the line item you want to book from the list.
- Check the information transferred from the ASN in the "Quantity" and "Unit" fields. Verify that the quantity matches the actual quantity of items in the Shipment.
- If necessary, add a lock, a tenant, or a serial number.
- Enter a handling unit number in the "Handling unit" field, or let Bitergo WMS generate a number automatically.
- Select the Load support for the new handling unit, e.g., EURO pallet.
- In needed, enter the height of the handling unit.
- Click the "Book" button to Book the handling unit to the preselected Receiving goods location .
- 10. If the Shipment contains additional items, click the "Item" field to select the next item and follow steps 3--8 .
- Repeat the process until you have processed all items in the shipment and booked them to the Receiving goods location .
Receive Delivery With ASN NVE
Unlike a goods receipt against a shipping notice (ASN) without an NVE / SSCC, this involves a shipment that already has a shipping unit number, which can be imported into Bitergo WMS as is. Therefore, start the process by scanning the NVE / SSCC directly on the delivered goods or entering it manually in the "Handling unit" field. The information for the line items is then imported. You can verify the quantity and unit for all line items and then book the Shipment to the goods receipt.
Home

After you have selected the Receiving goods location and clicked the "Goods Receipt Against ASN-NVE" button, the "IG-01 ASN-NVE" page opens.
In the header, you will find:
- the Back icon (left arrow) on the left side: cancels the process and returns you to the home page. All entries in the fields of the main area will be lost.
- the page name: It consists of the selected Receiving goods location followed by "ASN-NVE"
- the additional menu icon (three dots stacked vertically) on the far right.
In the main work area, you will find the following fields:
- Shipment
- Receive Delivery
- Handling Unit
- Item
- Quantity (appears after selecting the stock unit number or NVE / SSCC )
- Unit (appears after selecting the stock keeping unit number or NVE / SSCC )
- Serial Number
- Locks
- Load support
- Height
- Unit
"Shipment" field
The "Shipment" field is disabled initially. Scan a handling unit using the "Handling Unit" field or enter a stock unit number manually.
"Receive Delivery" Field
The "Receive Delivery" field is disabled initially. Scan a handling unit using the "Handling Unit" field or enter a stock unit number manually.
"Handling Unit" field
Scan the NVE / SSCC (shipping unit number) or enter it manually using the keyboard, then press "Enter" to confirm the entry.
"Item" field
After the NVE / SSCC /handling unit is confirmed, the first item appears in the "Item" field, and the "Quantity" and "Unit" fields are displayed. If the shipment consists of multiple items, arrows appear on the far left and right sides of the "Item" field, allowing you to navigate through the individual items to edit them.
"Serial Number" Field
The "Serial Number" field can be optionally displayed via the settings in the sidebar menu. For more information, see the "Sidebar Menu" section. Here you can enter the item's serial number.
"Locks" Field
After selecting the item and the quantity, you can add locks via the "Locks" field if desired. A lock means that the item is blocked for certain processes, for example, due to quality inspection, damage, a recall, or the need for clarification. To select a lock, click the "+" icon on the right side of the "Locks" field.
"Tenant" Field
The "Tenant" field can be optionally displayed via the settings in the sidebar menu. For more information, see the "Sidebar Menu" section. Here, you can assign a tenant---already created in the master data---to the shipment.
"Load support" Field
In the "Load support" field, you can select the appropriate Load support from the dropdown menu of predefined Load supports. The list of Load supports is defined in the Master Data app. In the settings, you can select a default load support, which will then appear as the default in the field. Additionally, you can specify in the settings whether selecting a Load support is required or not.
"Book" Button
Once you have entered all the necessary information for the handling unit, click the "Book" button at the bottom of the page to book the handling unit to the selected Receiving goods location .
The message "ASN has been booked!!" appears at the bottom of the page.
The "Shipment" field is highlighted so you can continue the process with the next Shipment.
Processing an ASN-NVE with Multiple Line Items
Here is an example of an ASN-NVE from the Incoming Goods Web App. The created ASN-NVE has the Shipment number Liefer-00000083, the goods receipt (receive Delivery) number WE-00000058, and consists of two stock units with stock unit numbers 2378 and 2379. The first handling unit has one line item (item 0001, 50 pieces); the second has three line items (item 0002, 59 pieces; item 0006, 40 pieces; and item 014, 22 pieces).
Now let's look at how this Shipment is processed in the Incoming Goods Mobile App:
After selecting "Receive Delivery via ASN-NVE" on the home screen, the IG-01 ASN-NVE page opens. The "Handling unit" field is highlighted.
By scanning the NVE / SSCC barcode on the Shipment or manually entering the NVE / SSCC via the keyboard, the handling unit is selected; the predefined goods receipt number appears in the "Receive Delivery" field, and the first item appears in the "Item" field. In this case, this handling unit has only one item and can be booked after the goods have been inspected by clicking the "Book" button.
After handling unit 2378 has been booked, the "Handling unit" field is cleared.
Now it's handling unit 2379's turn; it has three items. After entering or scanning the NVE / SSCC, the item for the first position appears in the "Item" field, along with the quantity and unit. Since the handling unit consists of three items, arrows appear in the "Item" field to switch between the items.
After reviewing all three items, you can book the handling unit to the selected Receiving goods location by clicking the "Book" button.
At the bottom of the page, the message "ASN has been booked" appears.
Additional Menu
Using the additional menu in the upper-right corner of the header, you can perform the following functions:
- Change Bin Location: Use the "Change Bin Location" dialog to change the Bin Location to which you are booking the selected Shipment.
- Add a note to receive delivery: Add a note to the entire goods receipt or to specific items.
- Add Alternative IDs
- Information:
- Container No.
- Seal No.
- Truck arrival
- Start of unloading
- End of unloading
- Truck Departure
- Add image to receive delivery...: Add an image to the goods receipt by, for example, taking a photo with the camera or selecting one or more existing images from the gallery.
- Details: Displays information about the selected shipment, such as the ASN shipment number, the shipper, the NVE / SSCC or stock-keeping unit number, the LHM, and the shipment's processing status.
Instructions for Receive Delivery With ASN NVE
- Select the Receiving goods location to which you want to book the shipment by manually entering it in the "RD Location" field or by scanning. Click the "Receive Delivery Against ASN-NVE" button.
- Scan the NVE/stock unit number on the shipment or enter the NVE manually in the "Handling Unit" field.
- Go through all the items in the shipment by using the arrows in the "Item" field. Check the quantity and unit of the goods for each item.
- If necessary, add a lock, a tenant, or a serial number.
- Optionally enter the size of the handling unit.
- Click the "Book" button to book the stock unit to the preselected Receiving goods location . The message appears: "ASN was booked!"
Receive Delivery Without ASN
After you have selected the Receiving goods location and clicked the "Receive Delivery without ASN" button, the "IG-01without ASN" page opens.
In the header, you will find:
- the Back icon (left arrow) on the left side: cancels the process and returns you to the home page. All entries in the fields of the main area will be lost.
- the page name: It consists of the selected Receiving goods location followed by "without ASN."
- the additional menu icon (three dots stacked vertically) on the far right.
In the main work area, you will find the following fields:
- Receive Delivery
- Item
- Quantity
- Unit
- Unpacked
- Unit
- Serial number (optional via sidebar menu / Settings)
- Locks
- Tenant (optional via sidebar menu / Settings)
- Handling unit
- Load support
- Height
- Unit
"Receive Delivery" Field
By default, Bitergo WMS will generate a new goods receipt number if you leave the "Receive Delivery" field blank.
Alternatively, you can use the "Receive Delivery" field to select an existing goods receipt in order to book additional goods to it.
Clicking the "Receive Delivery" field opens the "Receive Delivery" page. Here you'll see a list of all currently available goods receipts. The following information is displayed for each goods receipt:
- RD Number/Name
- Status
- Number of handling units
- Description
- Remarks
- Delivery Note
Select a goods receipt from the list to book additional goods to it.
"Item" field
Use the "Item" field to select the item number you want to book. You can enter the item number manually using the keyboard or use the magnifying glass to select an item from the item master.
Click the magnifying glass to open the "Item Master" page.
Click on an item in the list to select it. You will be returned to the previous page, and the item number will appear in the "Item" field. The "Quantity" field will be highlighted so you can enter the desired quantity of this item you wish to book.
Enter the appropriate quantity of the item in the "Quantity" field and select the appropriate unit in the "Unit" field.
"Serial Number" Field
The "Serial Number" field can be optionally displayed via the settings in the sidebar menu. For more information, see the "Sidebar Menu" section. Here you can enter the item's serial number.
"Locks" Field
After selecting the item and the quantity, you can add locks via the "Locks" field if desired. A lock means that the item is blocked for certain processes, for example, due to quality inspection, damage, a recall, or the need for clarification. To select a lock, click the "+" icon on the right side of the "Locks" field.
The "Locks Selection" page will appear. Here you can create a new lock or select an existing one.
In the header, you'll find:
- the Back icon (left arrow) on the left side: cancels the action and takes you back to the previous page.
- the page name: Locks Selection
- the Refresh icon on the far right.
The main area displays all available locks. If there are no locks available or if you want to create a new lock, you can click the "+" icon in the lower-right corner.
The "Create Locks" dialog box opens. In this dialog, you can select a template from previously defined templates for the new lock and add a name and a comment to the new lock. Click the "Save" button to create the new lock or the "Cancel" button to cancel the process. After you save the new lock, it will appear on the "Locks Selection" page. Click the Back icon in the header to return to the previous page.
"Tenant" Field
The "Tenant" field can be optionally displayed via the settings in the sidebar menu. For more information, see the "Sidebar Menu" section. Here, you can assign a tenant---already created in the master data---to the shipment.
"Handling unit" Field
In the "Handling unit" field, you can enter your own handling unit number or leave the field blank. Bitergo WMS will then automatically generate a new handling unit number. You can control this behavior via the settings in the app; see the "Sidebar Menu" chapter for details.
In the "Load support" field, you can select the appropriate Load support from the dropdown list of predefined Load supports. The list of Load supports is defined in the Master Data app. In the settings, you can select a default load support, which will then appear as the default in the field. Additionally, you can specify in the settings whether selecting a Load support is required or not.
"Book" button
Once you have entered all the necessary information for the item, click the "Book" button at the bottom of the page to book the stock unit to the selected Receiving goods location .
The message "Receive Delivery Booked" appears at the bottom of the page.
The "Receive Delivery" field displays the Receive Delivery number you just created or previously selected, in case you want to book additional items to it. You can use the settings in the sidebar menu (see the "Sidebar Menu" chapter) to specify whether the input fields should be cleared after each booking or not.
The "Item" field is highlighted so that you can continue the process with the next shipment.
Additional Menu
Using the Additional Menu in the upper-right corner of the header, you can perform the following functions:
- Change Bin Location: Using the "Change Bin Location" dialog, you can change the Bin Location to which you are booking the selected shipment.
- Add a note to receive delivery: Add a note to the entire goods receipt or to specific line items.
- Add Alternative IDs
- Information:
- Container No.
- Seal No.
- Truck Arrival
- Start of unloading
- End of unloading
- Truck Departure
- Item Master Data
- Add an image to the receive delivery...: Add an image to the goods receipt by, for example, taking a photo with the camera or selecting one or more existing images from the gallery.
Instructions for Receive Delivery without a Delivery Notice
- Select the Receiving goods location to which you want to book the shipment by manually entering it in the "RD Location" field or by scanning. Click the "Receive Delivery without ASN" button.
- If you want to add an item to an existing goods receipt, click the magnifying glass in the "Receive Delivery" field and select the goods receipt to which you want to book the additional item from the list. Otherwise, leave this field blank, and Bitergo WMS will generate a new goods receipt number. Select the item you want to book: Enter the item number directly or click the magnifying glass in the "Item" field to open the item master. Select the item you want to book from the list.
- Enter the appropriate quantity of the item in the "Quantity" field and select the appropriate unit in the "Unit" field.
- Fill in additional information if necessary, such as serial number or tenant, or add restrictions if desired.
- If desired, enter a handling unit number to generate a new handling unit with that number. If you leave the field blank, Bitergo WMS will generate a new handling unit number.
- Select the Load support and, if necessary, enter the height and unit of the shipment.
- Click the "Book" button to book the item. The message "Receive Delivery booked!" will appear.
Sidebar Menu
Click the menu icon in the upper-left corner to open the sidebar. In the sidebar, you'll see your email address---the one you used to log in to Bitergo WMS---at the top of the header. Below that, you'll see three menu items:
- Log Off: Click "Log Off" to log out of the app.
- Imprint: The legal notice, additional information about Bitergo WMS, and contact information for the support team.
- Settings (in the Administration category)
Settings
On the Settings page, you'll find the following entries:
Category: Administration
- Language: Sets the language of the app's interface. The app must be restarted for the change to take effect.
- Address: Displays the server address.
- Send Log: Sends the error log to the server.
- Reload System Properties: Reloads the system properties from the server
Category: Scan
- Scan Prefix: Sets a prefix after which the input field is cleared.
- Scan Postfix: Specifies a postfix after which the input field is cleared.
- Send Enter after Pre- and Postfix: Triggers an Enter key event after the pre- and postfix have been registered in the scan.
- Remove leading zeros: Removes leading zeros from the scanned barcode
Category: Device Settings
- Camera: Enables the device's camera for use by the app.
Category: View
- Pages Interval: Specifies how many items are displayed per page.
- Default Load Support: Sets a default load support.
- Show Serial No.: Displays the "Serial Number" field in the user interface.
- Show Tenant: Displays the "Tenant" field in the user interface.
- Query Copy:
- Empty Mask (Clear Form): Clears the form after a transaction.
- Generate HU Number: If no handling unit number was scanned, one is automatically generated.
- Load support selection: If this checkbox is selected, selecting a Load support is required.
- Print Label: Prints the label after booking.
- Default Printer: Select the default printer for label printing
- Select parent UH at Bin Location: Please consult the Bitergo Support Team regarding this.
- Show Handling unit Input Field: Shows the handling unit input field.
- Require ASN Scan Before Receiving: Specifies whether the ASN must be scanned before processing a goods receipt.
- Limit item master scan: When enabled, only the last 10 digits of the item are scanned. (Only for goods receipts without an ASN)
- Reset RD Location: After booking a goods receipt, the RD Location (Receiving Goods Location)field on the home page is cleared.