
Picking Mobile App Documentation
Table of Contents: Picking Mobile App
Introduction
Picking Web App
Picking Mobile App
Basic Concepts
User Interface
Step-by-Step Guide to the App
Login
Manually entering your login credentials
Scanning Your Personal QR Code
Instructions for processing a picklist
Step 1:
Step 2:
Step 3:
Step 4:
Step 5:
Step 6:
Step 7:
Step 8:
Step 9:
Step 10:
Additional Resources
Table of Contents: Picking Mobile App
Introduction
Picking Web App
With the Picking Web App, you can systematically prepare and release customer orders and shipments in the warehouse for picking. The Web App supports the creation, editing, release, and monitoring of picking orders, as well as the generation of picking lists that can then be processed on mobile devices. Picking orders reserve the required items in inventory, take into account batches, expiration dates, and restricted stock, and ensure that the correct items in the correct quantities are made available for shipment.
Picking Mobile App
Once a picking list is released, it becomes available in the Picking Mobile App. Warehouse staff then physically pick the items with the support of the Picking Mobile App using barcode scanning and deliver them to the designated packing or shipping stations.
Basic Concepts
First, the shipments that need to be picked are created or imported in the Picking Web App. These shipments can be created manually, imported via a .csv file, or imported directly into Bitergo WMS from an external system via an interface.
A delivery can be one of the following four types:
- Shipment (SHP)
- Shipment with Handling Units (SHP HU)
- Internal (internal)
- Internal with Handling Units (Internal HU)
The first two types, "Shipment" and "Shipment with Handling Units", are intended for orders that leave the warehouse and result in inventory changes. Use these two types for orders that leave the warehouse. If goods are to be moved specifically within the warehouse, you can use one of the two types: "Internal" or "Internal with Handling Units". These types are inventory-controlled because the inventory remains in the warehouse. Examples include:
- Expired goods are to be picked and sent to a specific storage location for further processing.
- Goods of a specific item with batches 1, 2, or 3 have a specific issue. To address this, all handling units with batches 1, 2, or 3 must be moved to a specific location so that a quality inspection can be performed.
After a new shipment is created, items (Type 1: Shipment) or entire handling units (Type 2: Shipment with Handling Units) must be added to the shipment using the "Positions" function. The shipments must then be released.
A shipment can have the following statuses:
- Pending (if it has not yet been released)
- Approved (after the shipment has been approved for picking)
- Reserved (after a picking list has been created for the shipment. The created picking list must now be released for picking on the shop floor. Once released, the picking list appears in the ***Picking Mobile App*** and can be picked by employees on the shop floor.
- In Execution: When the picking list has been released for picking.
A shipment can be assigned a series of standard classifications that can be used to control specific process steps, such as printing a specific item label or a packing slip.
Furthermore, destination storage locations can be defined to which the picked goods are to be transported for further processing, for example, to a packing station or directly to a goods-out station.
A shipment can also be assigned a priority between 1 and 10. The priority number determines the order in which the delivery is processed relative to other deliveries. Priority "1" is equivalent to the "Express" setting.
Setting the picking strategy correctly is essential for optimized and efficient picking. Bitergo WMS offers a wide range of parameters and automation functions, as well as the ability to create multiple picking strategies that can be used depending on the order. Configuring the picking strategy is a process step that must be guided or handled by the Bitergo WMS Support Team.
After the picklists have been released for picking, the picking process is continued and completed using the *Picking Mobile App*.
All the released picklists appear in the Picking Mobile App. The picking process works as following:
- Select the picklist you wish to process.
- Select one of the pick positions that are contained in the list.
- Select a picking unit and the kind of load support you will use for picking the selected picklist.
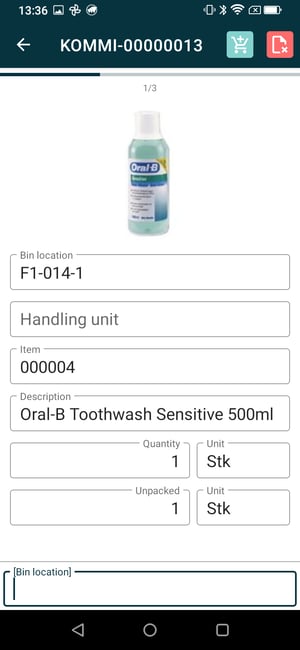
- The app then shows the first pick position and gives you directions for picking the requested item. Specifically, the bin location where the item is stored and the quantity that needs to be picked.
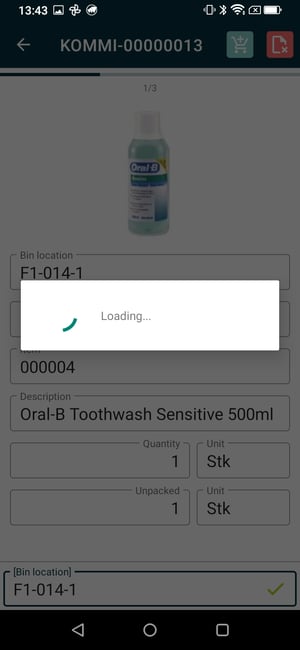
- After going to the bin location, pick the requested number of items and scan the bin location code to confirm the pick.
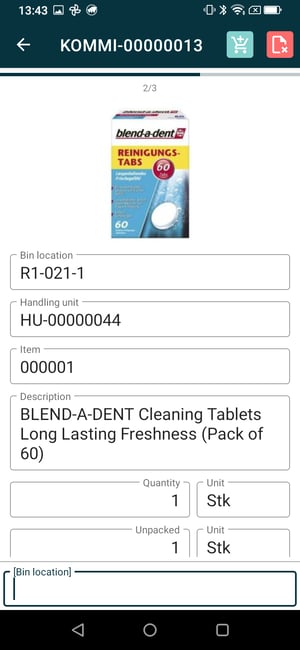
- The next item on the list is shown with directions to the bin location and the quantity that needs to be picked.
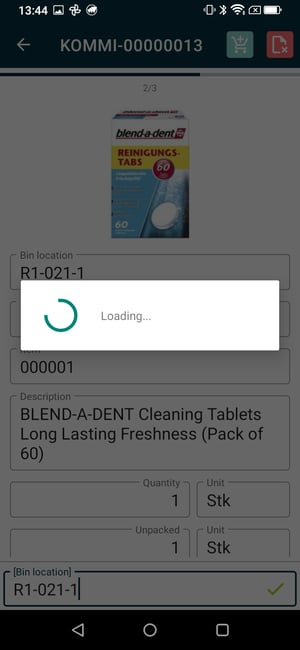
- Pick the requested quantity and confirm the pick by scanning the bin location code.
- Repeat the process for all the items on the picklist.
- After having picked all the items on the list, the Picking Mobile App asks you to bring all the picked items to the designated destination, which has been defined for the specific picklist in the Picking Web App, for example a packing station. Confirm the delivery of the picked items with a scan of the destination bin location code.
- Chose next picklist and repeat the process.
User Interface
The Picking Mobile App uses the standard Bitergo WMS mobile app user interface. For more details, see the document on User Interface and User Experience.
Step-by-Step Guide to the App
Login
You can log in to the app in two ways:
- by manually entering your user credentials
- by scanning your personal QR code from the Bitergo WMS user portal
Manually entering your login credentials
In the "User" field, enter the email address you used to register with Bitergo WMS, and in the "Password" field, enter your password. Click the "Login" button to log in to the system. You will be logged in and redirected to the app's home screen. If necessary, you can use the "Change Server" button to manually enter or change the server address of your Bitergo WMS.
Scanning Your Personal QR Code
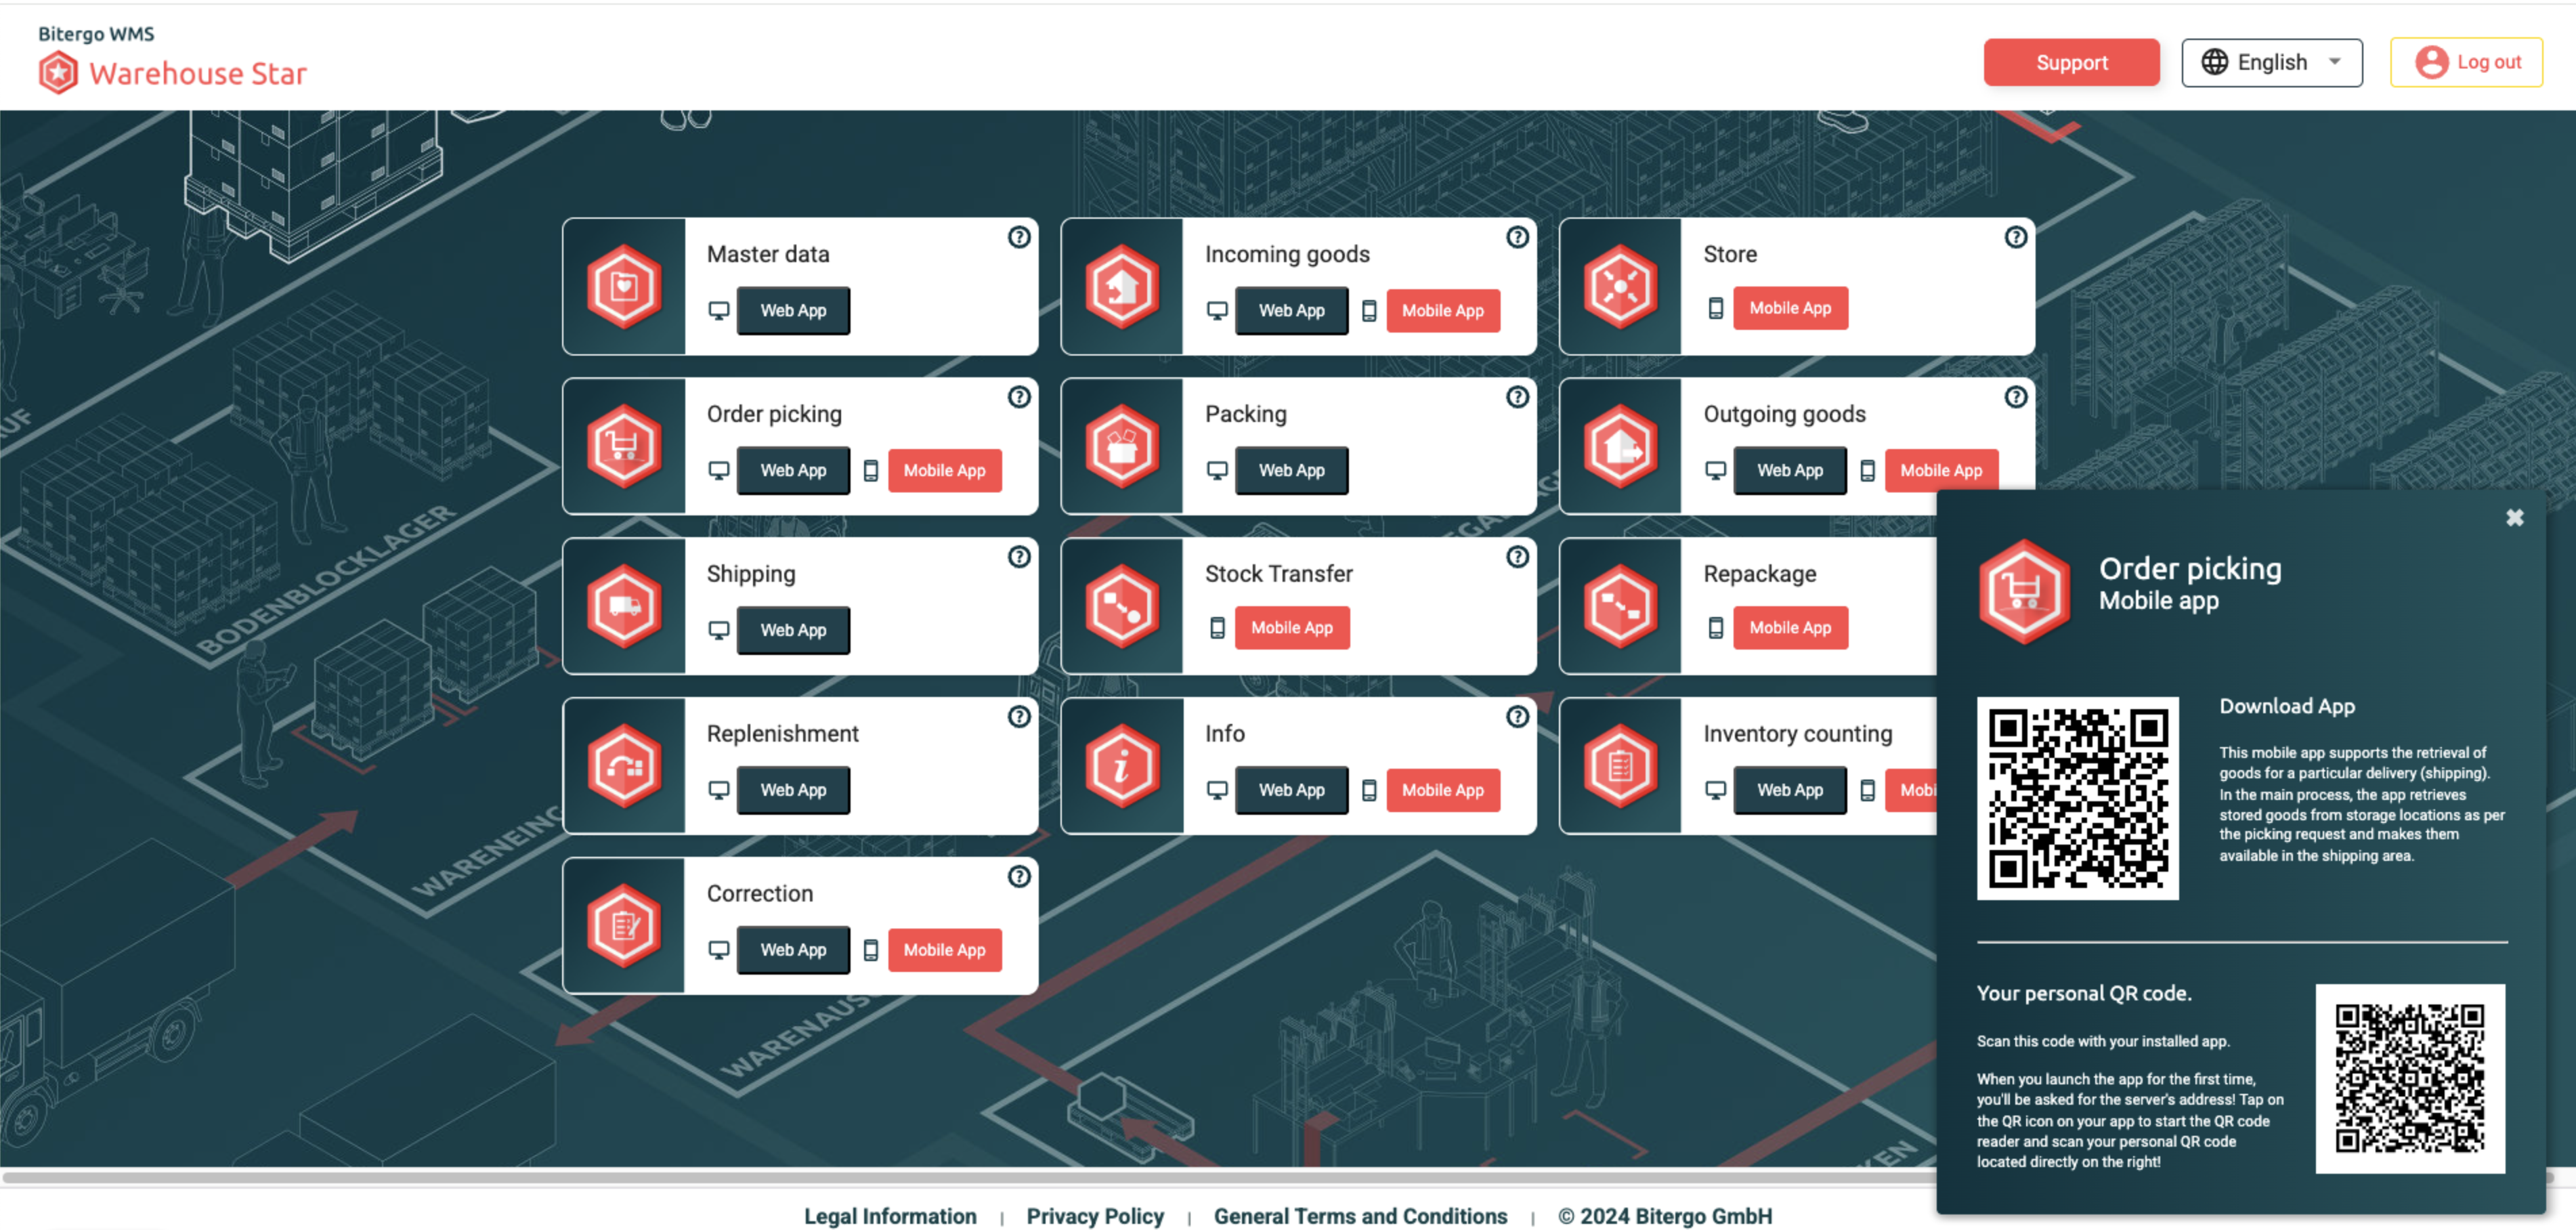
Click the QR code icon to open the camera. Log in to the user portal using a browser on another device and scan your personal QR code with the camera. It contains your user information, password, and the server address. As soon as the QR code is scanned, you will be logged in and redirected to the app's home screen.

Instructions for processing a picklist
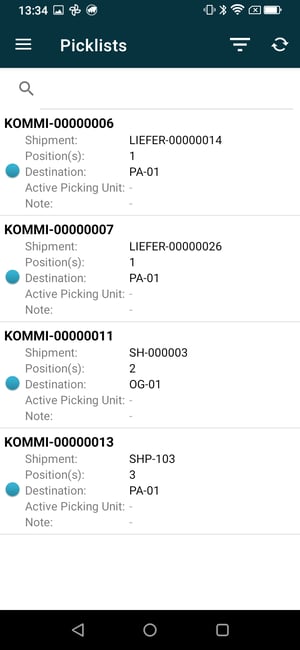
Step 1:
Select the picklist you wish to process.

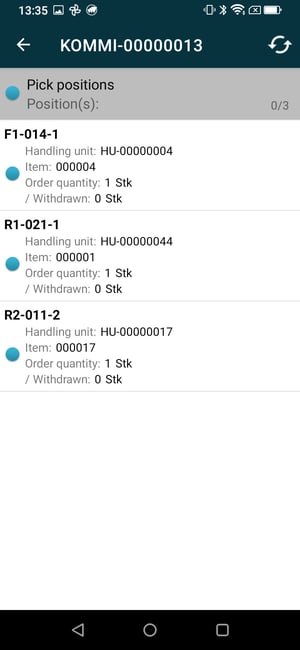
Step 2:
Select one of the pick positions that are contained in the list.

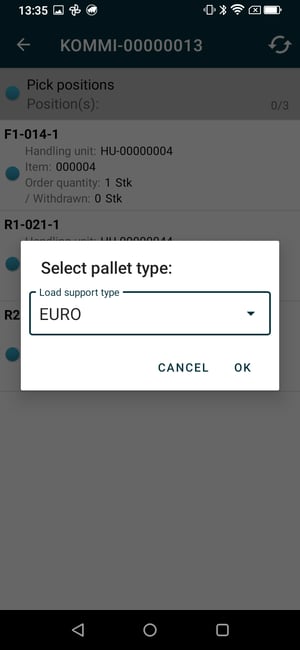
Step 3:
Select a picking unit and the kind of load support you will use for picking the selected picklist.

Step 4:
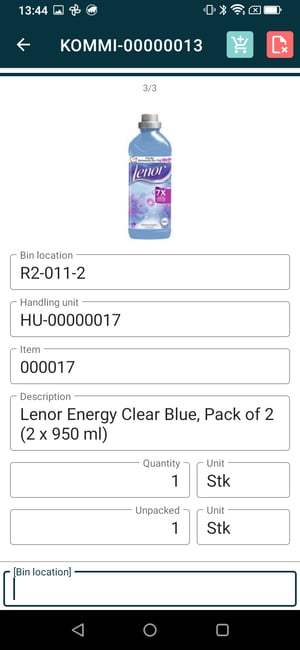
The app then shows the first pick position and gives you directions for picking the requested item. Specifically, the bin location where the item is stored and the quantity that needs to be picked.

Step 5:
After going to the bin location, pick the requested number of items and scan the bin location code to confirm the pick.

Step 6:
The next item on the list is shown with directions to the bin location and the quantity that needs to be picked.

Step 7:
Pick the requested quantity and confirm the pick by scanning the bin location code.

Step 8:
Repeat the process for all the items on the picklist. Pick the requested quantity and scan the bin location code to confirm.

Step 9:
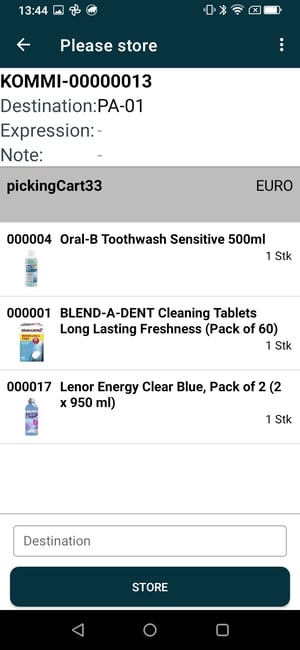
After having picked all the items on the list, the Picking Mobile App asks you to bring all the picked items to the designated destination, for example a packing station. Bring the items to the designated destination location and confirm the delivery of the picked items with a scan of the destination bin location code.

Step 10:
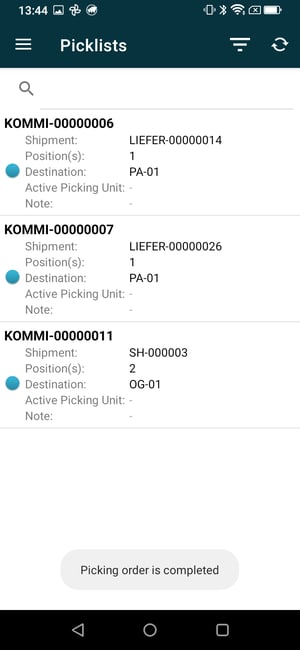
Chose next picklist and repeat the process.

Additional Resources
- Getting Started Tutorial
- Documentation Picking Web App